
 For my husband’s side, we pull names for a sort of Secret Santa and for three out of the last four years, I’ve pulled my sister-in-law’s name. You may remember two years ago, I designed a custom skirt for her. My original plan was to make her a blazer to go with that skirt, but in November she basically bought exactly what I intended to make. I decided to swing from office wear to lounge wear and make her the coziest and chic-est top and cowl to snuggle up in.
 I fell in love with these dainty stripes at Fabrications and decided to throw caution to the wind and make a whole top out of ribbing. It was fairly stable and had good recovery, so I figured it would work out alright. What I didn’t account for was just how heavy it was. The weight combined with the stretch caused it to stretch out at the neckline, but with the slouchiness of this Linden, I think it worked. If you plan to use ribbing to make an entire shirt, I would recommend sizing down and/or stabilizing the neckline.
 I also decided this was the time to try out a split-hem on my Linden. I love a good pattern hack and when I saw Heather’s split-hem Linden, I knew I had to try it out. I’m a hippy lady, so I love anything that gives me a little extra movement at the hips. I’m also all for making a pattern a thousand times but tweaking it just enough to make it look different. I’m 100 per cent going to make myself a split-hem Linden late in 2018 (yes, I’ve planned my holiday outfit for NEXT Christmas. )
Here’s how to do it:
 Cut out everything like normal. Instead of sewing together the two hem band pieces at the sides, fold them in half lengthwise, like a hot dog (can you tell I’m a teacher?)
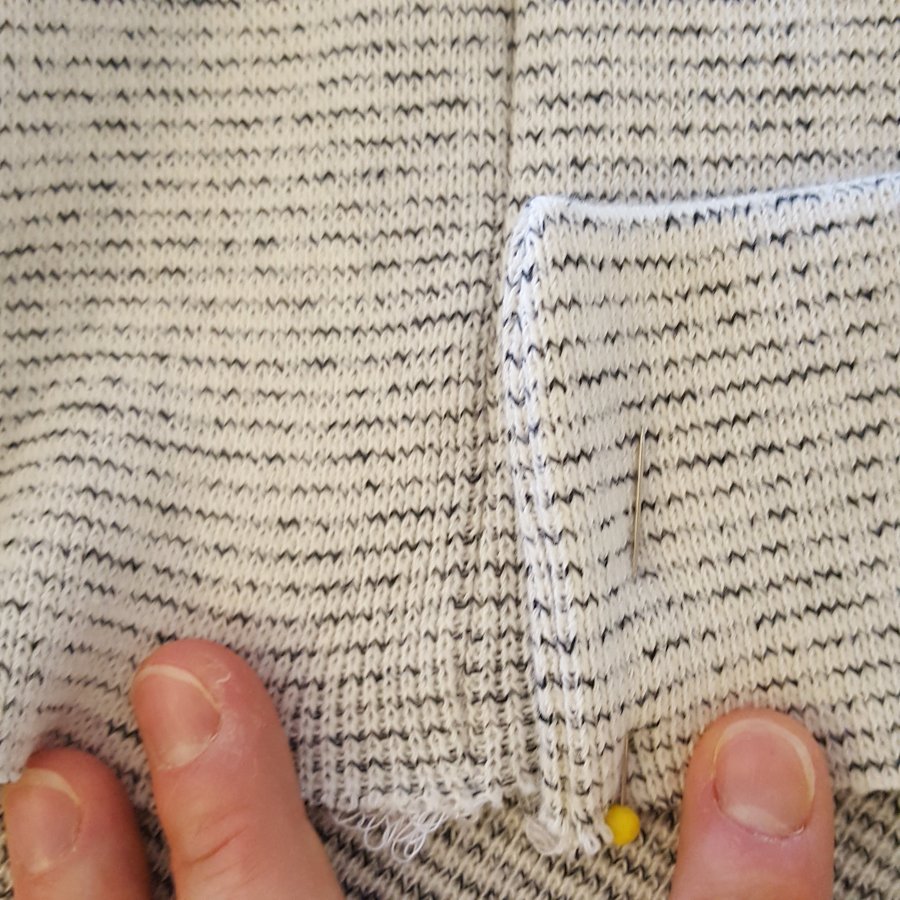
 Sew (or serge) the ends and turn right side out. You should have two long bands with neatly sewn edges on the short sides.

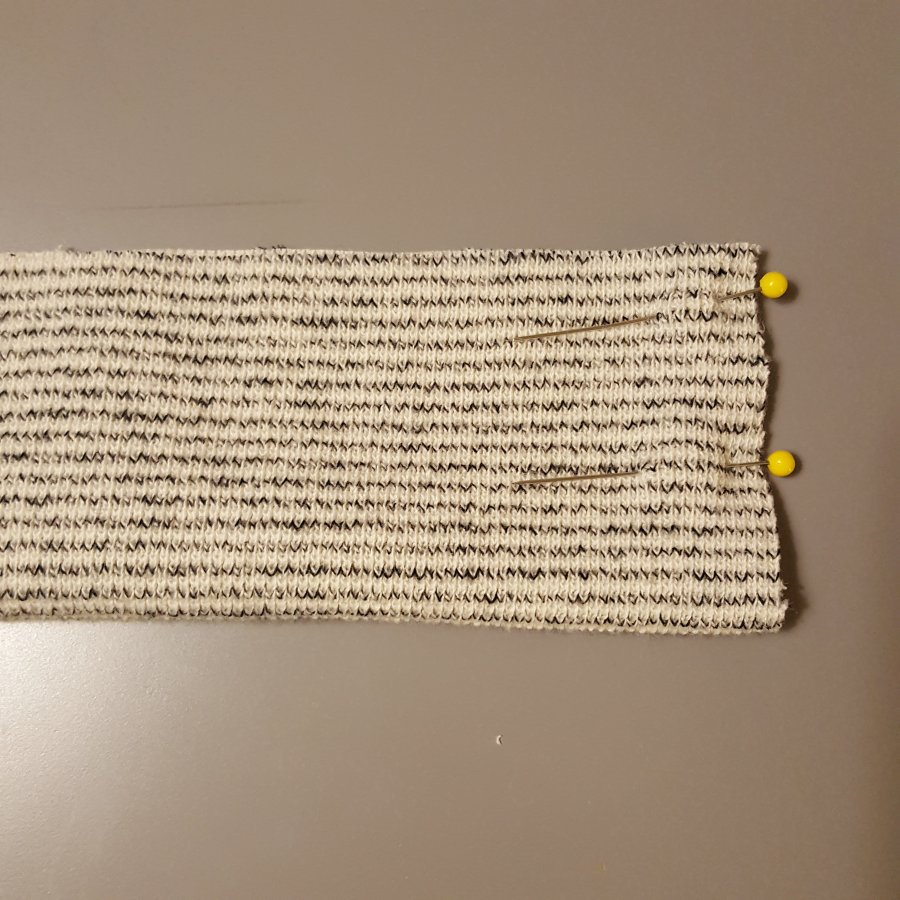
The next step is the trickiest. Pin the band to the sweatshirt bottom with right sides together. You want to make sure that the finished edges of your bands meet at the seam.
 To do this, stretch the fabric of the shirt body as you pin the inch closest to the side seam. Use lots of pins. Once you have both sides pinned on, stretch the shirt at the side seam to make sure there is no gap.
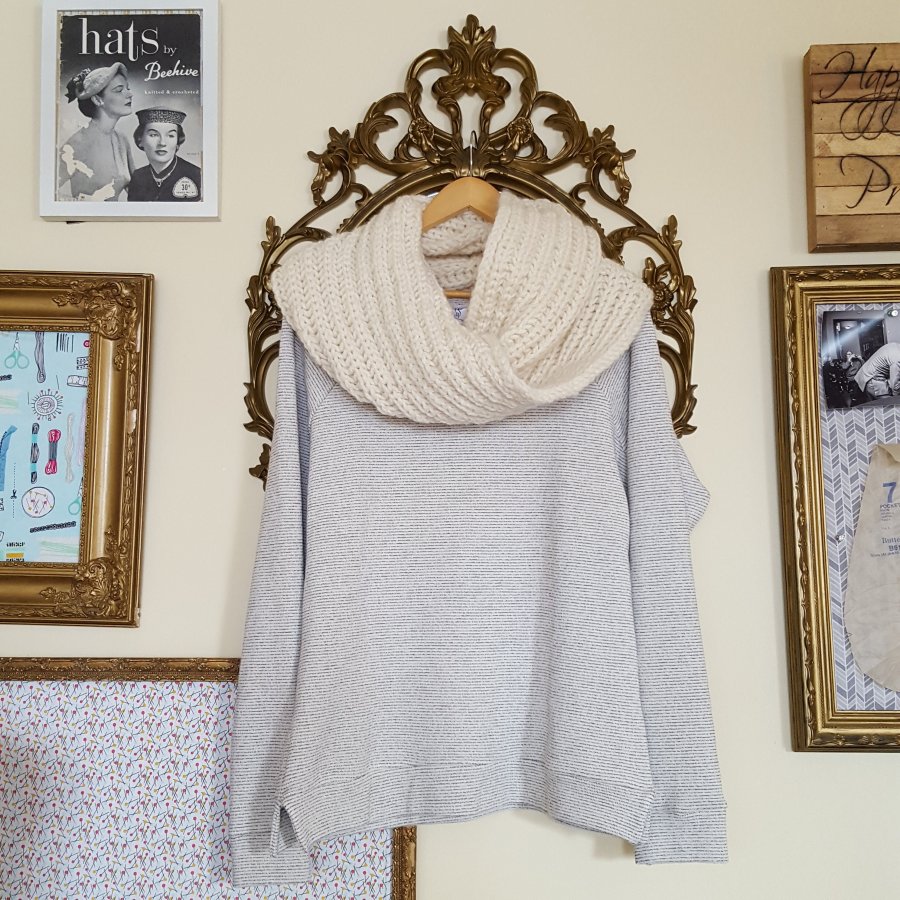
Sew those bands on and turn inside out! You are done! If you are interested in the pattern for the cowl neck scarf, it’s a quick and easy Ravelry freebie!

[…] just too big, size up one or two sizes, but make sure the sleves still hit at the wrist bone. I also find that a split hem makes this top look a little more like a sweater than a sweatshirt and looks great over leggings. I don’t recommend View B (the cropped […]