
 If you follow me on Instagram, you’ll know that this dress has been a struggle. Some of the issues I had were sequin-related (and I’ve got a whole post dedicated to that coming soon) and some weren’t. This dress took a lot of work, research and crowd-sourced encouragement.
 I’m turning 31 on March 31st meaning that this is my champagne birthday. My drink of choice is sparkling wine and I was suuuuuuuper pregnant for my 30th, so I told everyone to hold off celebrating last year because 31 would be the year.
 Orignally, I thought I would buy a dress because I’d read that sequins are a pain to deal with, but, if you’ve made your own clothes for any length of time, you’ll know that RTW is never exactly what you want and why settle when you can make your own? Plan B was a RTW champagne-themed top and a me-made sequin dirndl skirt because it seemed the easiest option. But, then, I did some more reading on sequins and realized not all are created equal and headed to the fabric store. There, I fell in love with these multi-directional blush pink sequins that had juuuuuuust enough left on the bolt (in two pieces – that took some creative pattern placement) for my old favourite Simplicity by Cynthia Rowley s1873 that I’ve actually made three times already (the blue roses, the green failure, and the pink print.)
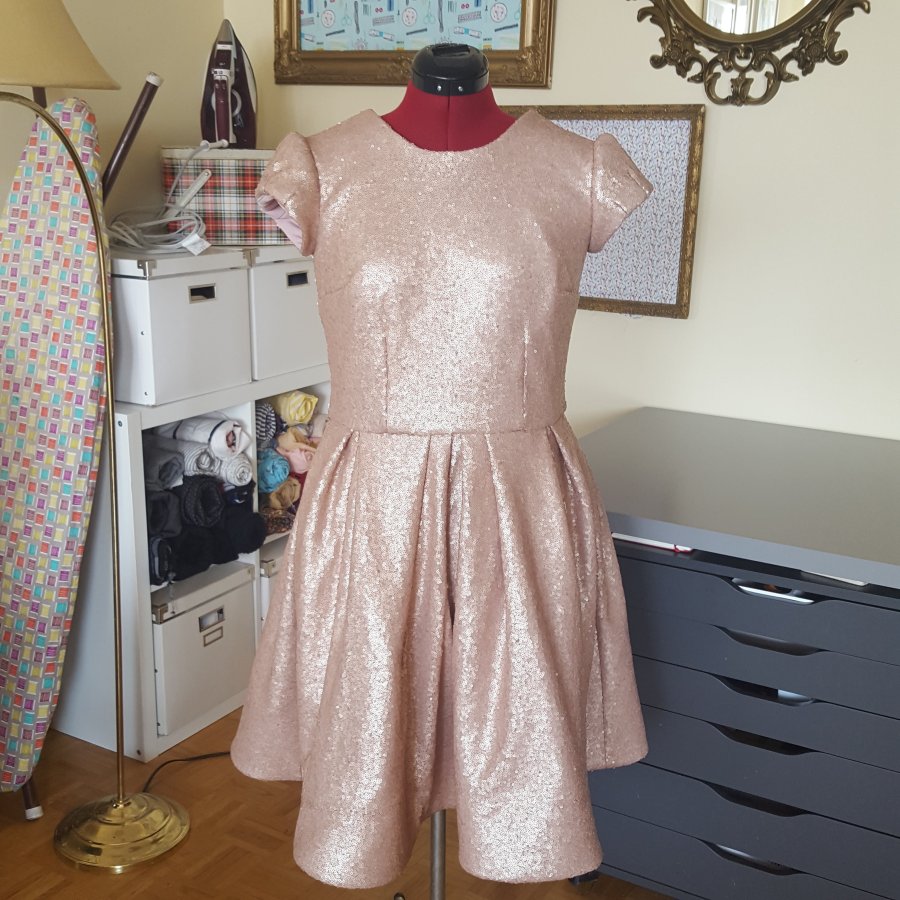
 Even though I love this pattern to death (and, Cynthia Rowley, if you’re reading, please start making patterns for Simplicity again! Please!), it was actually the first time I actually sewed it up as the pattern intended. For one, I actually made the sleeves and I totally regret not making these cute little capped numbers each and every time. They are full of darts, but the sweetest little things you’ve ever seen.
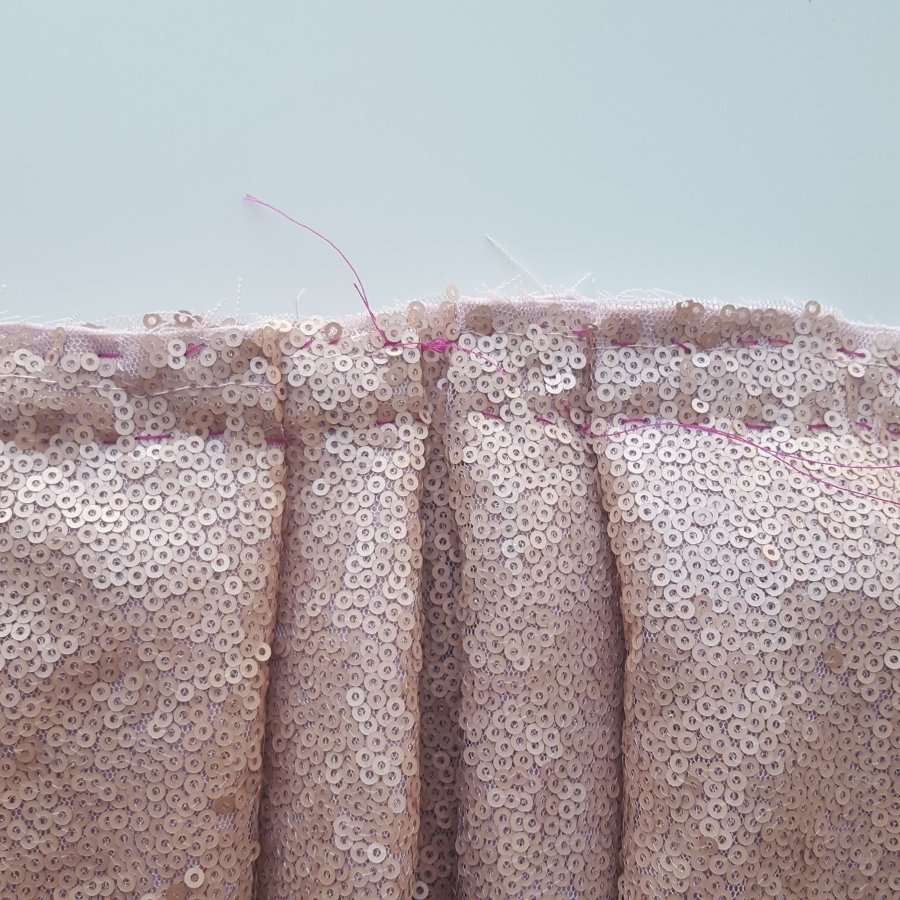
 The sleeves did pose quite a conundrum, however. The pattern instructions just have you leave them raw, which I was not about to do. I asked for advice on the ‘gram and got a lot of options, and tried many before I landed on the right one. I tried pinking them, but my fabric plus the backing and the lining (all of that multiplied by two at the shoulder seam) made for extreme thickness that my poor little shears could not get through. Next, I tried serging after pre-trimming excess to save my poor little serger blade. Again, too thick and I bent my last serger needle. After a week of waiting for new ones to arrive in the mail, I tried again, but struggled to get an even line of serging. Eventually, I just resigned myself to binding with bias strips of the lining and ended up doing it all by hand. I had pretty much no seam allowance left by this point. I’m pretty happy with how they ended up, though.
 I also actually did the pleats as the pattern asks. I’ve always found the pattern super confusing, so I did large knife pleats the first time I made this and made a basic dirndl skirt the next two times. This saves an enormous amount of time and is my favourite way to show off border prints. (Stay tuned for an EPIC border print dress in this pattern. I’ve been hoarding a sewing souvenir 3 metres of the most gorgeous border print and it’s being made up for a wedding this summer). I enjoy the way they turned out, but honestly, I think I like the other two options better.
 My original plan to finish the seams of the skirt was to do a Hong Kong binding, but I realized that was stupid as I would still have exposed sequins rubbing against my legs. I ended up lining the skirt, but, in hindsight, did it in the most difficult way possible. For some reason I decided to baste the lining to the outer skirt and attach them to the bodice as one piece. This is dumb for two reasons: 1) I still had to hand stitch the bodice to the skirt, which I could have avoided had I sewn the skirt lining to bodice lining instead; and 2) it made for an awkward back seam around the zipper. If you line this skirt, don’t do what I did.
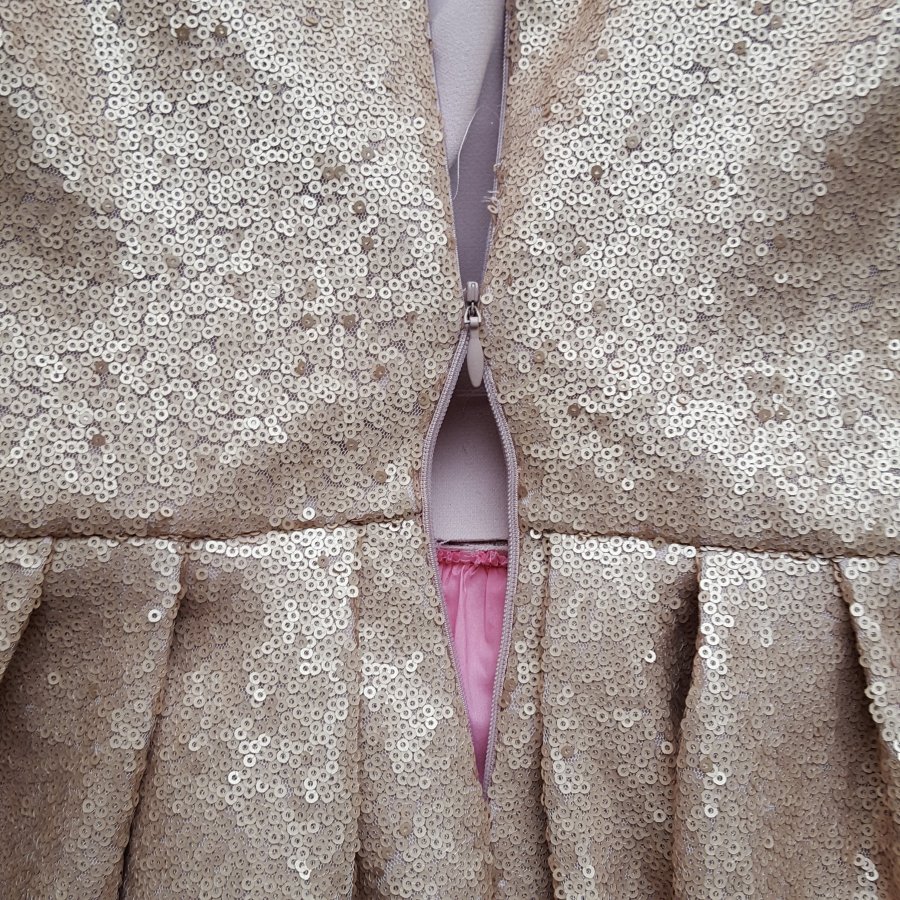 The other big issue I had was the zipper. If you read about the terrible green dress, you’ll know that I’ve had issues with invisible zips and heavy fabrics with this pattern. I’m not super happy with how the zipper turned out (spoiler alert: it’s not invisible), but it’s okay.
 The last finishing touch was adding 4-inch horsehair braid to my hem. I’ll talk more about this later, but let me leave you with this nugget: always measure how much you need and always pin first. I estimated how much I needed and got exactly enough, but the first time I tried putting it on, didn’t pin and ended up having to unpick the whole thing.
 Keep an eye out in the next few weeks for a post aaaaaallll about what I learned on sequins. IT’S NOT AS SCARY AS YOU THINK!
I don’t get to wear this beauty until late March, but she’s staying on the dress form in my livingroom until then so I can gaze at her beauty.

I love it. The colour is great and the simple shape really suits it. Good for you for persevering and also sharing all the gory details of working with sequins.
Congratulations on finishing that up, Samantha! It looks great. And I really like your tag, too!
[…] and fuchsia dress for a wedding/graduation (I know what I like!). Most recently, I made myself a pink sequined version for my champagne […]
[…] in #sewfrosting as I had kinda gotten fancy sewing out of my system this spring when I made the sequin dress for my birthday party. But then, I remembered, that I had dreamed of making a cosy, but very extra […]